Showing posts with label results. Show all posts

10 Aug 2018

Review: Tarte Rain Forest By The Sea Palette II


              When I first laid eyes on this pallete I was attracted to the darker colors 
             instantly. Tarte described how this palette's eyeshadows contained built-in 
             primer. The second thing that drew me in was the stunning packaging. It's
             not only stylish, but functional.The mirror with Tarte's logo is large and very
             helpful. Tarte is always generous with their mirror size inside palettes.


Swatches

My favorite colors are Pearl (Foiled), Sunset (Shimmery), Seaside (Matte), and Breezy (Matte).
The swatches 
above took a minimum of three swipes to be as pigmented as they look. I believe
that this 
is due to the built-in primer that the Rainforest By The Sea collection prides itself on. Having the built-in primer was definitely a selling point for me, but it seems to make it harder to blend once it is applied. The key to using this palette is patience and LOTS of layers in order
for you to get the pigmentation you see above. Please comment 
below if you have used this palette and let me know how it works for you.


20 May 2017

Making My Own Pressed Glitter Palette

I'm sure many of you are familiar with pressed glitter palettes 
and single pans. If you're in the beauty community and you love 
DIY projects this is a must for you! I have read several different
methods of making your own Pressed Glitters

To be clear this is the how I made my pressed glitters, and I don't 

consider this a tutorial. I am simply documenting my first experience
making them. 

I had ordered a mixing tray and batch of isopropyl alcohol for this DIY,
and
it was lost in the mail during my move/change of address. 


Therefore, I had to improvise on a couple things.


As you can see I'm using cupcake wrappers instead of a mixing tray
to 
mix the glitter together to make the specific colour that I want. I
have 
my palette, empty pans, mixing bowl, syringe (no needle
necessary), 
Coconut Oil, Aloe Vera Gel, Assorted glitter, tooth picks
and a Citrus note based Perfume 
(80% Alcohol). 

I mixed the Coconut Oil, Aloe Vera Gel and 80% Alcohol together by
using the 
syringe to suck it up and plunge it repeatedly until the solution
is a cloudy colour.


These are the three colours I used to make 'Unicorn Horn'


Colour combination: Matte white, Shimmery white and baby
pink iridescent sparkle. I ended up adding a larger amount 
than pictured, but it was easy to mix together with enough
of the solution (I filled the pan with solution before hand). 


I filled the syringe pretty much around the '1' mark but I added a
few drops 
while mixing if the glitter seemed a bit clumpy/dry. I put 
the pans in the palette, and the palette went into the refrigerator
for 24 hours


Here are the results


Here are all the finished pans inside the palette. After fully drying they are even more
vibrant than in the single pan photos above. Swatches on the right were done after the
24 hour drying period.


I was very pleased with the results. It is much easier than I originally thought
it would be. 
The biggest issue you might have is the glittery mess that is left
over. If you intend to try this, I would highly recommend that you wait the
24 hours for your pressed glitters to fully dry. Some of mine dried quicker
and some were still moist. Either way, I am glad to have to have successfully
my own palette.

18 Jan 2016

REVIEW: L'Oréal Glam Lights #2 Dark Blonde to Light Blonde w/ B&A


Since the last time I tried Loreal Paris's Preference Glam Lights #3
(Light Brown to Dark Blonde), I felt I wanted something a bit lighter.
Something with less coppery tones. 


I know I was breaking major hair colouring rules by not doing a base coat of 
blonde on my roots; as well as trimming off the darker Obre style hair I have 
near the bottom. I wanted to see how I could take my years of colouring my 
hair at home and make this work as best I could.


I apologize for my badly overgrown roots, but the results will blow you 
away. Here you can see the colour differences in different parts of my hair, 
and this would be difficult to go any lighter usually. 


I started applying small amounts to the applicator and gently combing it through from root to where my hair is significantly lighter (10 cm/5 in). I made sure to use my finger to spread the cream until it reached my roots if the applicator failed to distribute the cream. I repeated this process all the way around and in the under part of my hair to cover as much of the darker part of my hair as possible (knowing it will develop slower than the lighter bits). 

Now I started brushing the applicator full of the cream from bottom of where 
my roots end to the bottom end of my hair. I repeat this process until I have enough cream left to put on my glove (about the same amount you would use to apply shampoo to your hair). I use this to cover my roots around my whole head, so my natural hair colour will lighten a colour shades to blend in with 
the rest of my hair.


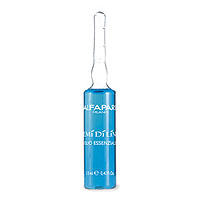
I spent close to 45 minutes on application, and it was developed enough to wash within 5 minutes of me finishing. I would also like to add that I used a store-bought toner (not as affective as a salon grade one!), and I will continue using a toner until I am am satisfied the tone has no copper tones showing through.Another treatment I put into my hair is AlfaParf Semi Di Lino Illuminating Essential Oil.


After these two treatments and heaps of applying and rinsing here are the final results.


I am pretty happy with the outcome, even more so than I was the first
time I used this product range. I think I will use this product again, and
I hope this helps someone who is thinking of trying Glam Lights out.

1 Nov 2015

My Halloween Haunted House Adventure

Yes, you have read correctly. There was a decent Haunted House Event in Melbourne this year! When I first heard about this a couple months ago I didn't think it would be so huge. If you read my blog you'll also know how unprepared I was in the upcoming weeks before Halloween. I had just relegated myself to wearing some cheap kitty mask and doing my hair maybe in two buns (for ears), but my S.O. offered to pick up a costume for me next to his work. 


Here are a few pics throughout the night.


Everything I used on my face/body for tonight's look

If you are interested in the specific items I used please ask in the comments section.


 My makeup before I ruin it


 My S.O. before he goes into the Haunted House to scare people (Leatherface)


End of the night, blood on my arms, back and hair. Tipsy and exhausted.
 If you buy this costume, make sure you have a lighter coloured dress or slip
go underneath. It is VERY sheer, and in this case I just happened to have
an old creme coloured forever new 40's Sweet Heart Dress.  


Moving on, the evening came. It was hot, dry, and windy. My hair fell flat, so I gave up after the second attempt to keep reapplying curls. After that, I started vlogging. Here is the result....


Note: May need to turn your volume down for this :)